A car battery gradually loses its ability to hold a charge, even with proper care and regular maintenance. Warning signs such as dim headlights, slow engine cranking, or repeated jump-starts can indicate that the battery needs replacement. An older battery may also be due for a change, depending on its condition and service life. Learning how to change a car battery can save time and help you handle this basic maintenance task at home with a few common tools.
How to Change a Car Battery Step by Step
Step 1: Park the Car on a Level Surface

Park the vehicle on a flat, stable surface in a safe location away from moving traffic. Turn off the engine, engage the parking brake, and remove the key from the ignition. Keep the work area away from open flames, sparks, and water.
A driveway or well-ventilated garage provides a suitable workspace. If you work inside a garage, keep the door open to maintain adequate ventilation.
Disconnecting the battery may reset the vehicle’s clock, radio presets, navigation settings, or alarm system. Check the owner’s manual beforehand for any security codes or reset procedures you may need after installing the new battery.
Step 2: Wear Safety Gear and Open the Hood
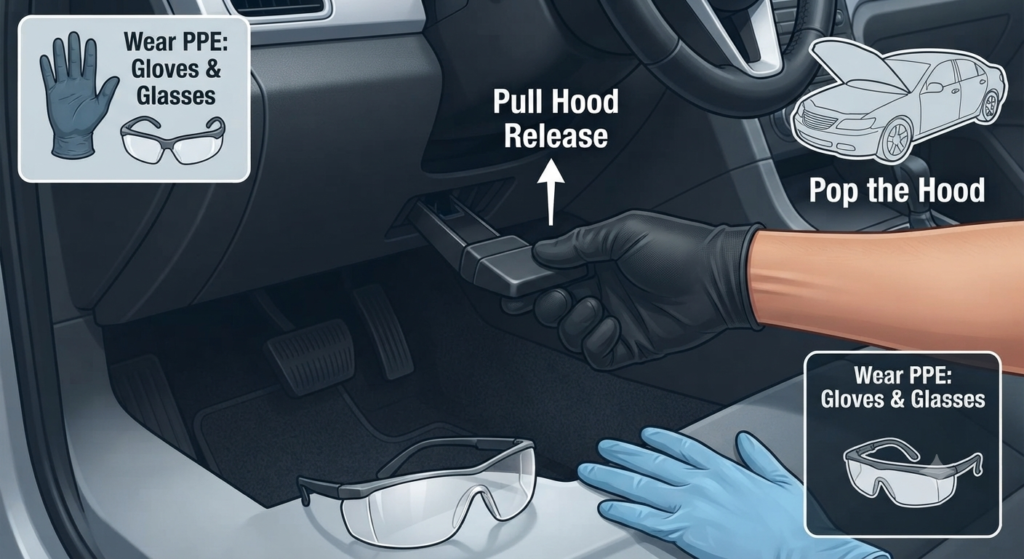
Before working on the battery, put on safety goggles and insulated gloves. Lead-acid batteries contain sulfuric acid, which can cause serious skin and eye irritation. They can also release hydrogen gas, so keep the area away from flames, sparks, and other ignition sources.
Open the hood and secure it with the support rod if your vehicle has one. Remove metal jewelry, such as rings, bracelets, or watches, to reduce the risk of accidental contact with electrical terminals. Wearing old work clothes can also help protect your regular clothing from dirt and grease.
Step 3: Locate the Battery
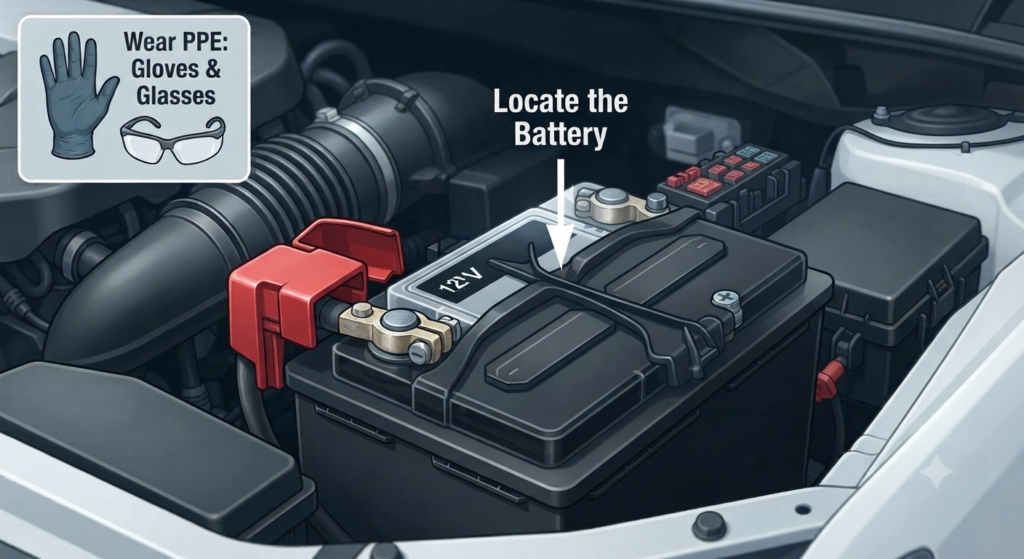
Find the car battery inside the engine compartment. In many vehicles, it sits toward one side of the engine bay, either near the front or closer to the windshield. Look for a rectangular battery with positive and negative cables connected to its terminals.
Some newer vehicles place the battery beneath a plastic protective cover, which you may need to remove before accessing it. If you cannot locate the battery under the hood, check the owner’s manual, as some vehicles position the battery in the trunk or another designated compartment.
Step 4: Disconnect the Negative Battery Cable
Start by disconnecting the negative (-) cable before removing the positive cable. This sequence helps reduce the risk of an accidental short circuit while you work on the battery.
Identify the negative terminal, which is usually marked with a minus (-) sign and often has a black cable. If a protective cover is present, remove it. Loosen the terminal clamp with the appropriate wrench and lift the cable away from the battery post.
Keep the disconnected cable away from the battery terminal and other metal parts. A cable tie or suitable nonconductive restraint can help hold it securely in place. Some vehicles use quick-release terminals, which can be removed without a wrench.
Step 5: Disconnect the Positive Battery Cable
Next, remove the positive (+) cable from the battery. The positive terminal is usually marked with a plus (+) sign and may have a red protective cover. Remove the cover if present, then loosen the terminal clamp with the appropriate wrench and lift the cable away from the battery post.
Secure the disconnected cable so it cannot accidentally contact the battery terminal or other metal components. Keep the positive and negative cables separated throughout the battery replacement process. Contact between a battery cable and an unintended metal surface can create a short circuit and cause sparks or damage.
Step 6: Remove the Old Battery
Release the battery hold-down bracket or retaining clamp that keeps the battery secured in place. Depending on the vehicle, you may need a socket wrench, suitable socket, or extension to loosen the fasteners.
Once the retaining hardware is removed, carefully lift the battery out of the engine compartment. Car batteries can be quite heavy, so use both hands and maintain a firm grip. If the battery is too heavy to handle safely on your own, ask someone to assist you.
Place the old battery on a stable, level surface while preparing to install the replacement.
Step 7: Clean the Battery Terminals
Before installing the new battery, inspect the battery terminals for corrosion or buildup. Corrosion may appear as a powdery white, blue, green, or gray deposit around the terminals.
Use a terminal-cleaning brush or fine abrasive material to remove the buildup and expose a clean metal surface. Cleaning the terminals helps ensure good electrical contact between the battery and cables.
Handle the terminals carefully and avoid direct contact with battery acid or any corrosive residue. Wear gloves and safety goggles during the cleaning process.
Step 8: Choose the Correct Replacement Battery
Before installing a new battery, make sure it matches your vehicle’s required size, specifications, and electrical capacity. Check the information printed on the old battery, including its group size, dimensions, capacity, and part number. You should also have your vehicle’s year, make, model, and engine type available when purchasing the replacement.
Do not choose a battery based only on its physical size. The replacement should meet the vehicle manufacturer’s recommended specifications and have the correct terminal arrangement.
After removing the old battery, dispose of it through an appropriate battery recycling or collection facility. Car batteries contain corrosive and environmentally harmful materials, so they should not be placed in regular household waste.
Step 9: Install and Secure the New Battery
Place the new battery in the battery tray with the terminals positioned in the same orientation as the old battery. Make sure the battery sits firmly in the tray before installing the hold-down bracket or retaining clamp.
Tighten the bracket securely so the battery cannot move or vibrate while the vehicle is running. Avoid overtightening the fasteners, as excessive force can damage the battery or its mounting hardware.
Apply a thin layer of battery terminal grease or lithium grease to the positive and negative terminals to help protect them from corrosion. Keep the grease limited to the battery terminals and avoid applying it to other engine components.
Step 10: Reconnect the Positive Battery Cable
Reconnect the positive (+) cable first. Carefully bring the cable to the positive battery terminal without allowing the connector to touch other metal parts. Place the cable securely over the terminal and tighten the clamp with the appropriate wrench.
If the battery has a protective cover, reinstall it over the positive terminal after tightening the connection. Make sure the cable sits firmly on the terminal and does not move when you gently check it.
Reconnecting the positive terminal first, followed by the negative terminal, helps reduce the risk of an accidental short circuit during the installation.
Step 11: Reconnect the Negative Battery Cable
Reconnect the negative (-) cable to the negative battery terminal. Place the cable clamp firmly over the terminal post and tighten it with the appropriate wrench.
Keep the wrench from touching other metal components while tightening the connection. Once secured, gently check the cable to make sure the clamp does not move or feel loose.
If the battery has a protective cover, reinstall it after securing the negative cable. With both terminals connected, the battery installation is complete.
Step 12: Start the Vehicle and Check the Systems
Before closing the hood, remove all tools and loose objects from the engine compartment. Make sure the battery is securely mounted and both terminals are properly connected. Then close the hood and start the vehicle.
The engine should start normally if the battery was the cause of the starting problem. If the vehicle does not start, check the battery connections and consult the owner’s manual or a qualified technician.
After starting the vehicle, check that the electrical systems are working properly. Reset the clock, radio presets, navigation settings, or other electronic features if they were reset when you disconnected the old battery. Some vehicles may also require an alarm or security code.
Conclusion
Knowing how to change a car battery can help you handle a common vehicle maintenance task safely and confidently. The process involves disconnecting the old battery, preparing and securing the replacement, reconnecting the terminals in the correct order, and checking the vehicle after installation.
Always use a replacement battery that meets your vehicle manufacturer’s specifications and follow the instructions in the owner’s manual. Take proper safety precautions when handling the battery, and recycle the old battery through an appropriate collection or recycling facility.
Read Next:
- How Do You Test a Lead Acid Battery? (Complete Guide)
- Maximising Battery Life: 11 Proven Tips for Long-Lasting Performance
- Difference Between CCA and CA: Key Differences in Battery Ratings
- Battery Sulfation: Causes, Effects, Symptoms, and Prevention
- Deep Cycle Batteries vs. Starting Batteries
- Battery Comparison Chart: Lead-Acid, Lithium-Ion & LFP